

 分类:
容器编排
分类:
容器编排
一.初始化主节点
环境:
搭建一个master主节点和一个node1的子节点
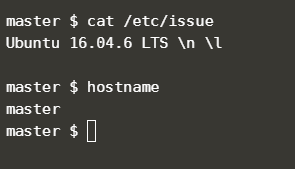
master
node1

通过已知令牌,进行搭建主节点(token可以自定义,或者去掉这一项,她会自动生成一个新的!)
kubeadm init --token=102952.1a7dd4cc8d1f4cc5 --kubernetes-version $(kubeadm version -o short)
命令执行完成后
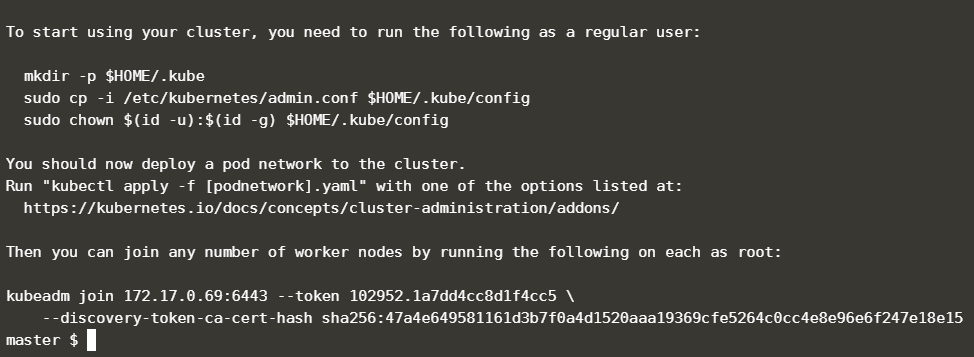
复制证书到 $HOME 目录下面,然后设置CLI的环境变量
sudo cp /etc/kubernetes/admin.conf $HOME/
改变用户ID
sudo chown $(id -u):$(id -g) $HOME/admin.conf
添加环境变量
export KUBECONFIG=$HOME/admin.conf
admin.conf有相关端口以及认证的东西
部署容器网络接口(CNI)
接下来我们可以通过WeaveWorks(Weave Net)查看部署定义
其他第三方更多插件: https://kubernetes.io/docs/concepts/cluster-administration/addons/#networking-and-network-policy

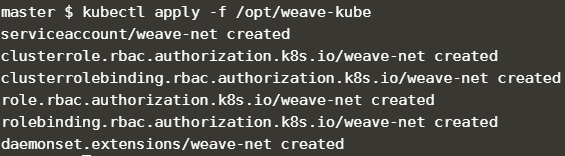
cat /opt/weave-kube
内容如下:
apiVersion: v1
kind: List
items:
  - apiVersion: v1
    kind: ServiceAccount
    metadata:
      name: weave-net
      labels:
        name: weave-net
      namespace: kube-system
  - apiVersion: rbac.authorization.k8s.io/v1beta1
    kind: ClusterRole
    metadata:
      name: weave-net
      labels:
        name: weave-net
    rules:
      - apiGroups:
          - ''
        resources:
          - pods
          - namespaces
          - nodes
        verbs:
          - get
          - list
          - watch
      - apiGroups:
          - extensions
        resources:
          - networkpolicies
        verbs:
          - get
          - list
          - watch
      - apiGroups:
          - 'networking.k8s.io'
        resources:
          - networkpolicies
        verbs:
          - get
          - list
          - watch
      - apiGroups:
        - ''
        resources:
        - nodes/status
        verbs:
        - patch
        - update
  - apiVersion: rbac.authorization.k8s.io/v1beta1
    kind: ClusterRoleBinding
    metadata:
      name: weave-net
      labels:
        name: weave-net
    roleRef:
      kind: ClusterRole
      name: weave-net
      apiGroup: rbac.authorization.k8s.io
    subjects:
      - kind: ServiceAccount
        name: weave-net
        namespace: kube-system
  - apiVersion: rbac.authorization.k8s.io/v1beta1
    kind: Role
    metadata:
      name: weave-net
      namespace: kube-system
      labels:
        name: weave-net
    rules:
      - apiGroups:
          - ''
        resources:
          - configmaps
        resourceNames:
          - weave-net
        verbs:
          - get
          - update
      - apiGroups:
          - ''
        resources:
          - configmaps
        verbs:
          - create
  - apiVersion: rbac.authorization.k8s.io/v1beta1
    kind: RoleBinding
    metadata:
      name: weave-net
      namespace: kube-system
      labels:
        name: weave-net
    roleRef:
      kind: Role
      name: weave-net
      apiGroup: rbac.authorization.k8s.io
    subjects:
      - kind: ServiceAccount
        name: weave-net
        namespace: kube-system
  - apiVersion: extensions/v1beta1
    kind: DaemonSet
    metadata:
      name: weave-net
      labels:
        name: weave-net
      namespace: kube-system
    spec:
      # Wait 5 seconds to let pod connect before rolling next pod
      minReadySeconds: 5
      template:
        metadata:
          labels:
            name: weave-net
        spec:
          containers:
            - name: weave
              command:
                - /home/weave/launch.sh
              env:
                - name: HOSTNAME
                  valueFrom:
                    fieldRef:
                      apiVersion: v1
                      fieldPath: spec.nodeName
              image: 'weaveworks/weave-kube:2.5.1'
              imagePullPolicy: IfNotPresent
              readinessProbe:
                httpGet:
                  host: 127.0.0.1
                  path: /status
                  port: 6784
              resources:
                requests:
                  cpu: 10m
              securityContext:
                privileged: true
              volumeMounts:
                - name: weavedb
                  mountPath: /weavedb
                - name: cni-bin
                  mountPath: /host/opt
                - name: cni-bin2
                  mountPath: /host/home
                - name: cni-conf
                  mountPath: /host/etc
                - name: dbus
                  mountPath: /host/var/lib/dbus
                - name: lib-modules
                  mountPath: /lib/modules
                - name: xtables-lock
                  mountPath: /run/xtables.lock
                  readOnly: false
            - name: weave-npc
              env:
                - name: HOSTNAME
                  valueFrom:
                    fieldRef:
                      apiVersion: v1
                      fieldPath: spec.nodeName
              image: 'weaveworks/weave-npc:2.5.1'
              imagePullPolicy: IfNotPresent
#npc-args
              resources:
                requests:
                  cpu: 10m
              securityContext:
                privileged: true
              volumeMounts:
                - name: xtables-lock
                  mountPath: /run/xtables.lock
                  readOnly: false
          hostNetwork: true
          hostPID: true
          restartPolicy: Always
          securityContext:
            seLinuxOptions: {}
          serviceAccountName: weave-net
          tolerations:
            - effect: NoSchedule
              operator: Exists
          volumes:
            - name: weavedb
              hostPath:
                path: /var/lib/weave
            - name: cni-bin
              hostPath:
                path: /opt
            - name: cni-bin2
              hostPath:
                path: /home
            - name: cni-conf
              hostPath:
                path: /etc
            - name: dbus
              hostPath:
                path: /var/lib/dbus
            - name: lib-modules
              hostPath:
                path: /lib/modules
            - name: xtables-lock
              hostPath:
                path: /run/xtables.lock
                type: FileOrCreate
      updateStrategy:
        type: RollingUpdate
部署Weave
kubectl apply -f /opt/weave-kube
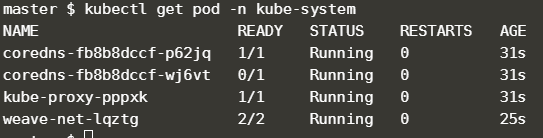
通过刚刚的 yaml 文件可以看出它所在的命名空间为 kube-system
kubectl get pod -n kube-system
在添加子节点到Node中
查看令牌集合
kubeadm token list

子节点(node1)执行命令添加到主节点(master)中
kubeadm join --discovery-token-unsafe-skip-ca-verification --token=102952.1a7dd4cc8d1f4cc5 172.17.0.21:6443
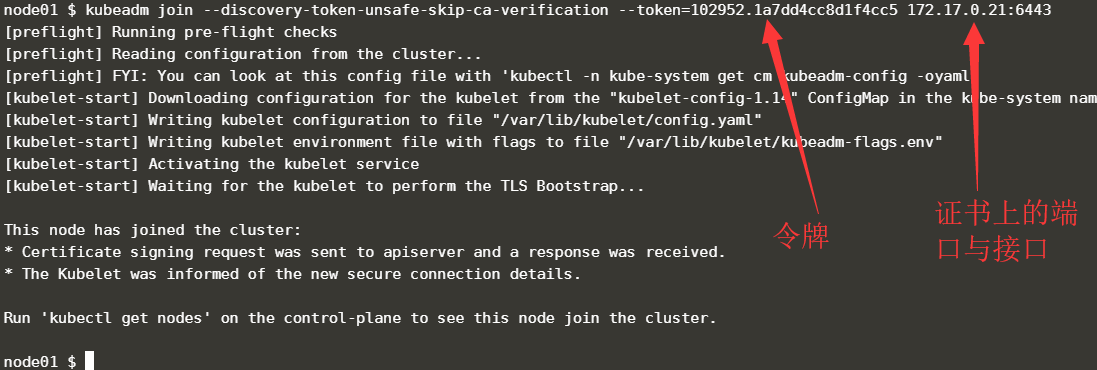
【注意】--discovery-token-unsafe-skip-ca-verification 标签用于绕过发现令牌验证!在生产中请使用 kubeadm init 命令...
回到master节点中查看节点
kubectl get nodes
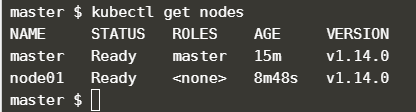
不难发现这个时候 node01 已经链接上了 master
这时我们来尝试以下部署一下Pod试试
在master中创建一个 nginx
kubectl create deployment httpn --image=nginx:1.8

查看一下 Pod
kubectl get pods

再来Node1节点中看看容器的位置
docker ps | grep nginx

这样一个简单的部署就部署好了
欢迎加群讨论技术,1群:677373950(满了,可以加,但通过不了),2群:656732739
评价


排名
6
文章
6
粉丝
16
评论
8
{{item.articleTitle}}
{{item.blogName}} : {{item.content}}
ICP备案 :渝ICP备18016597号-1
网站信息:2018-2026TNBLOG.NET
技术交流:群号656732739
联系我们:contact@tnblog.net
公网安备: 50010702506256
50010702506256

欢迎加群交流技术